Farmhouse Kitchen Counter Styling: Trays, Crocks and Cutting Boards
Style your kitchen counter zone by zone, with one useful group per stretch: a crock and tray beside the stove, layered boards in the corner, a coffee tray and a tidy sink, plus what to put away.
A farmhouse kitchen counter has two jobs that pull against each other. It should look warm and collected, and it should still leave you room to chop an onion. The counters that manage both are the ones where nearly everything on show is something you reach for most days.
The easiest way to get there is to stop treating the counter as one long surface and start thinking in zones. Each zone gets one tidy group of useful things, and the stretches between them stay empty. If you are still planning the wider room, the roundup of farmhouse kitchen decor ideas covers walls, windows and textiles; this guide stays on the countertop.
The rule of one group per stretch
A stretch is any run of counter between two interruptions: the stove, the sink, the refrigerator, a corner or the end of the cabinets. Give each stretch one group at most, and give the shortest stretches nothing at all.
A group means objects that touch or nearly touch and share a base, such as a tray, a board or a small stand. Three things spaced along a counter read as clutter. The same three pulled together on a tray read as a single decision, and they lift away in one move when you need the space or want to wipe underneath.
Check each stretch against three questions:
- Is there a clear landing spot beside the stove and beside the sink, roughly the width of a large cutting board, about 18 in (45 cm)?
- Can you wipe the whole stretch by moving one thing?
- Does every object in the group get used at least once a week?
Choose a material trio: wood, stoneware and glass
Counters look busy when every object is made of something different. Limit yourself to three materials and repeat them from zone to zone. Wood brings warmth through boards, spoons and trays. Stoneware adds visual weight and a soft matte surface in a crock, a salt bowl or a soap dish. Glass keeps things light in bottles, jars and canisters.
Aim to see each material at least twice across the kitchen so the groups feel related. A fourth material can appear once as an accent: a black metal stand, a woven basket or a linen towel. Keep colors as quiet as the materials, with cream, oat and honey wood doing most of the work and one green note from a potted herb.
Four zones at a glance
| Zone | The group | What to remember |
|---|---|---|
| Beside the stove | Crock of utensils; oil, vinegar and salt on a small tray | Set well to the side, clear of burners and heat |
| The corner | Layered cutting boards with a potted herb or a jar of wooden spoons | Hard to reach for prep, so display can live here |
| Coffee or tea spot | Tray with mugs, canisters and a spoon rest | Keep only what the daily routine uses |
| The sink | Soap dish and brush on a small stand | Raise things so water can drain |
Beside the stove: tools within reach, clear of the heat
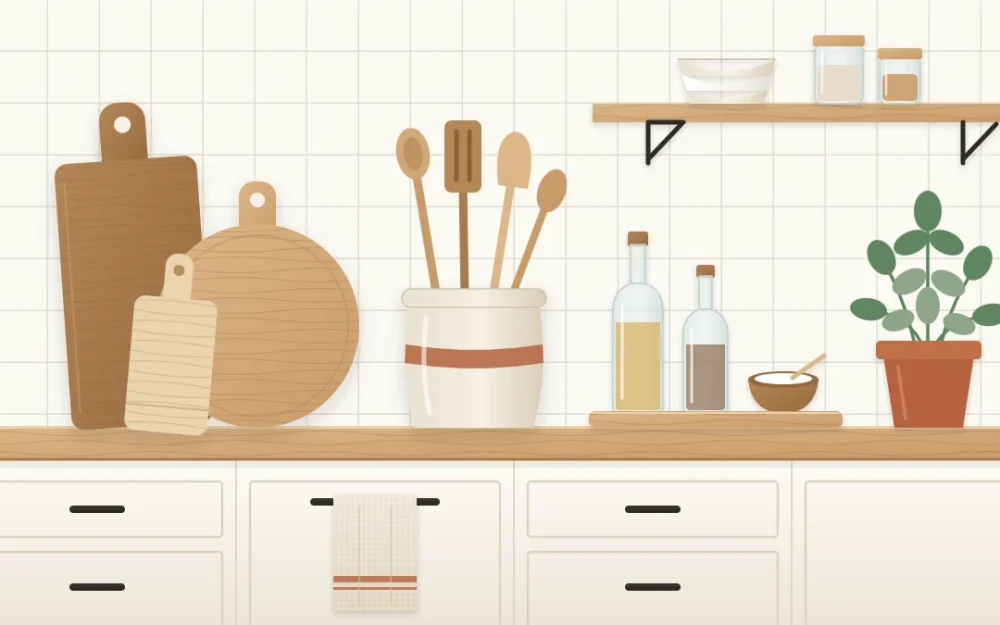
This is the hardest-working group, so let function choose every piece. A wide stoneware crock keeps wooden spoons, a spatula and a whisk upright. Edit it down to the tools you cook with weekly so each handle is easy to grab. Next to it, a small wooden tray gathers a bottle of cooking oil, a bottle of vinegar and a little bowl of salt. The tray catches drips and marks the edge of the group.
Good to know
Set this group well to the side of the burners, not behind or between them, so you never reach across a hot pan. Keep towels, wooden pieces, paper, dried stems and bottles of oil away from the cooktop and from anything else that gets hot, such as a toaster or a kettle. Purely decorative items belong in another zone.
The corner: layered boards and something green
A deep corner is awkward for prep, which makes it the natural home for the most decorative group. Lean three cutting boards of different shapes against the wall: the largest rectangle at the back, a round or paddle shape overlapping it, and the smallest in front. Let boards dry fully after washing before you lean them back in place.
In front of the boards, place one living or useful thing. A potted herb gives the counter its green note. A jar of wooden spoons works where the light is poor. Plain canning-style glass jars suit this spot, and there are more ways to use them in these mason jar decor ideas. Jars you have painted or decorated are for display only, not for food.
The coffee spot and the sink
Coffee or tea
Gather the daily ritual on one tray near the kettle or coffee maker: two or three mugs, a canister of coffee or tea, a small jar of sugar and a spoon rest. A tray with a low lip, about 12 by 16 in (30 by 40 cm) as a starting point, is big enough to be useful and small enough to slide aside.
Sink
The sink needs the least and shows the most. A stoneware soap dish or a refillable glass bottle, a wooden dish brush and a folded cloth are enough. Raise them on a small stand or footed dish so water drains away and the counter underneath can dry.
What to put away
Styling a counter is mostly subtraction. These are the usual things to move into a cabinet, a drawer or another room:
- Small appliances used less than once a week.
- Mail, keys, chargers and anything that belongs to another room.
- Duplicate utensils and tools that only come out for holidays.
- Packaged food still in its store packaging.
- Decorative objects with no job that sit on prime prep space.
If you own pretty everyday dishes and already have shelves on show, move them up there instead of stacking them on the counter. The guide to styling open kitchen shelves explains how to arrange them.
A weekly reset that keeps it looking styled
Once a week, lift each group, wipe underneath and return only what earned its place. If something new has crept in, either swap it for an item already there or find it a home behind a door.
Change one detail by season, such as the herb, the towel or the fruit in a bowl, and leave the rest alone. A counter stays calm because the number of groups stays fixed, not because the objects never change.
Frequently asked questions
How many things should sit on a kitchen counter?
There is no fixed number. A useful guide is one group per stretch of counter, with each group made of three to five everyday items on a shared tray, board or stand. If you can wipe a stretch by lifting one thing, and you still have clear room to prep beside the stove and sink, the amount is about right.
What can I keep next to the stove?
Keep cooking tools and a few daily ingredients nearby, but set them well to the side of the burners instead of behind them. A crock of utensils and a small tray with oil and salt work well. Towels, paper, wooden decor, dried stems and anything purely decorative should stay away from the cooktop and other hot appliances.
How do I make cutting boards look styled and not messy?
Use two or three boards in different shapes and lean them in overlapping layers, largest at the back and smallest in front. Keep them in one corner instead of spreading them out, and place a single object in front, such as a potted herb. Make sure boards are completely dry before you lean them back.