Farmhouse Shelf Styling: How to Arrange Wall Shelves and Bookcases
A repeatable method for arranging wall shelves and bookcases: clear them, gather pieces in one palette, build each shelf from three parts and leave room to breathe.
At a glance
- Difficulty
- Easy
- Time
- About 45 to 90 minutes for one shelf unit
- Best for
- Living room and hallway wall shelves and bookcases
- Look
- Calm, collected, neutral with a little green
What you need
- Books with neutral covers
- White or cream pitcher
- Wooden bowl
- Small woven basket
- Clear glass bottle
- Trailing plant or faux stems
- Plain framed print
Shelves are among the hardest surfaces in a room to get right, because everything on them is on display at once. Too much and they read as storage; too little and the room looks as if you have just moved in. Good farmhouse shelf styling sits between the two: a few honest materials, some books, something green, and enough empty space for each piece to be seen.
The method below works for wall shelves, alcoves and freestanding bookcases in a living room or hallway. It is a sequence rather than a talent, and you can repeat it whenever the shelves start to drift back toward clutter.
Clear Everything Off First
Take every object off the shelves and wipe them down. Rearranging in place rarely works, because the old arrangement keeps pulling you back to it. An empty shelf lets you see its real width, its depth and the wall color behind it.
Sort what came off into three piles: pieces you enjoy looking at, things that belong somewhere else in the house, and things to store or pass on. Only the first pile is allowed back.
Good to know
Shelves carry only what their maker rates them for, so check the guidance that came with yours before loading them with books or stoneware. If you are putting up a new wall shelf, choose the mounting hardware for your wall type, the weight of the shelf plus everything on it, and the manufacturer instructions. For a long or heavily loaded shelf, get help if you are unsure.
Gather Pieces in a Farmhouse Palette
Before anything goes back, collect candidates from around the house and set them out on a table or the floor. Having more than you need makes editing easier. Keep to a tight group of materials so the shelves look collected and calm:
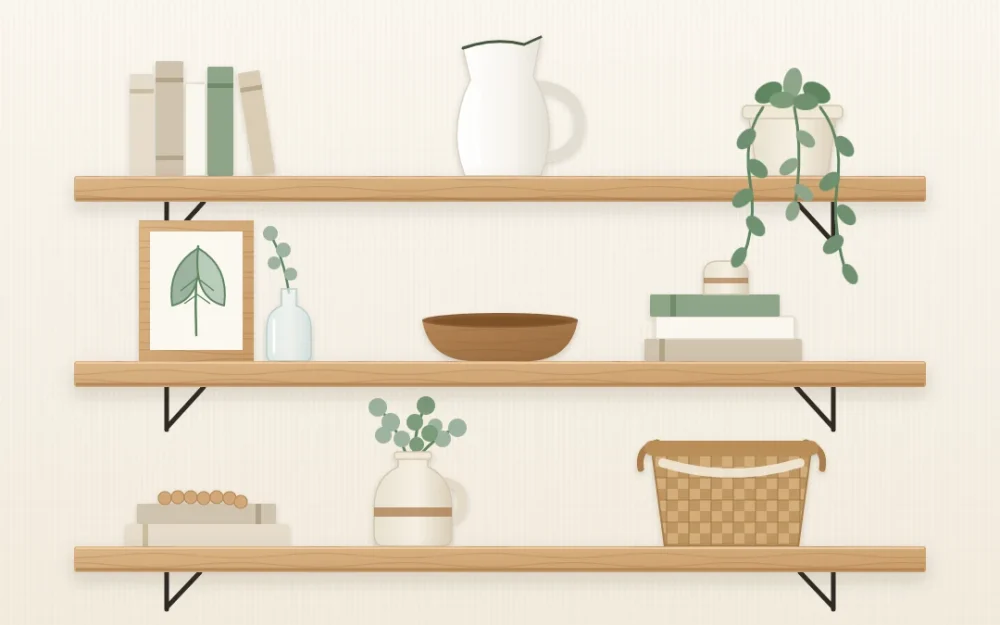
- White and cream ceramics: a pitcher, a jug, a bowl or a short stack of plain dishes.
- Wood: a turned bowl, a small board or a plain frame.
- Woven fiber: a small basket or lidded box, handy for hiding remotes and chargers.
- Glass: a clear bottle or jar, which adds shine without adding color.
- Greenery: one trailing plant or a few faux or dried stems.
- Books: a dozen or so with quiet covers.
One basket per shelf unit is usually plenty. The guide to using decorative baskets around the house covers weave, size and what to put inside them.
Build Each Shelf From Three Parts
Style one shelf at a time, and give each one the same simple skeleton.
- Place the anchor. This is the largest piece on the shelf: a stack of books, a wide bowl, a basket or a leaned frame. Set it off-center, about a third of the way along.
- Add a vertical element. Something tall and narrow, such as a pitcher, a bottle holding one stem or a short row of upright books, goes beside the anchor so the eye travels upward.
- Finish with one small, low piece. A little bowl, a short plant or a single object you love sits in front of or next to the others, slightly overlapping, so the group reads as one thing.
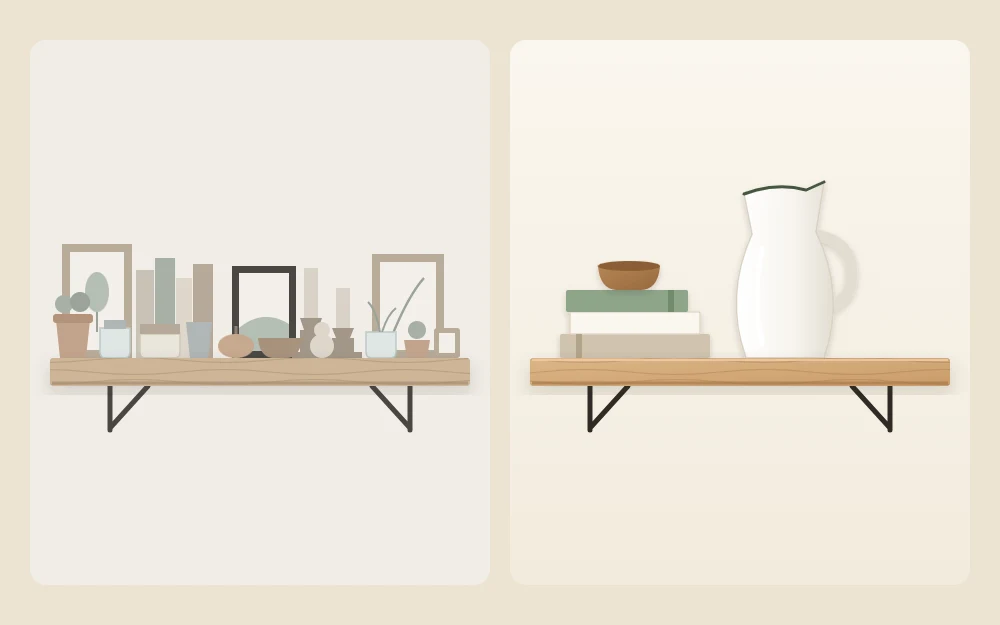
Then stop. Three parts is enough for most shelves up to roughly 36 in (90 cm) wide. A longer shelf can take two groups with a clear gap between them.
Make Books Part of the Arrangement
Books give shelves weight and purpose, and you probably own plenty already. Mix the two ways of placing them: a short upright row on one shelf, a horizontal stack of two or three on the next. A stack doubles as a platform that lifts a small object to a better height.
Bright covers can fight a neutral palette. Three easy options: remove the dust jackets to see what the plain binding looks like, group the quiet covers together and move the loud ones to a closed cabinet, or turn a few spines to the back so the pale page edges face out. Keep the books you actually reach for the right way round and at a comfortable height.
Zigzag the Heights From Shelf to Shelf
Now step back and look at the whole unit instead of one shelf. If the tall piece sits on the left of the top shelf, put the tall piece of the next shelf on the right, then left again below that. The eye follows the zigzag down the wall and the arrangement feels balanced without being symmetrical.
Stagger the visually heavy things in the same way. Baskets, dark objects and big stacks of books look most settled on the lower shelves. Glass, small ceramics and trailing greenery suit the higher ones, where they keep the top of the unit light.
Leave Space and Repeat Materials
As a rule of thumb, leave roughly a third of each shelf empty. The bare stretch is what separates styled shelves from full ones; it gives every group a clear edge and lets the wall color show through.
Then check for repetition. Each material should appear at least twice across the unit: white ceramic on two or three shelves, wood on two, green on two. A material that shows up only once tends to look like a stray, while a repeated one ties separate shelves into a single composition.
Tip
Take a quick picture of the shelves with your phone, or squint at them from across the room. Clumps, gaps and one-off colors show up far faster that way than they do up close.
Quick Fixes for Shelves That Still Look Off
- Cluttered: remove the smallest object from every shelf. Small things create most of the visual noise.
- Bare: bring in one larger piece instead of several little ones, or lean a frame at the back of a shelf.
- Flat: pull one item forward and let another overlap it, so there is a front and a back.
- Too colorful: swap bright book covers and packaging for neutral ones and let greenery be the only color.
- Themed: take away anything with lettering, and keep any motif to a single appearance.
Kitchen shelves follow slightly different rules, since the dishes on them are in daily use; see the method for styling open kitchen shelves. And if the wall around your shelves still feels empty, there are more ideas for decorating a blank farmhouse wall to choose from.
Frequently asked questions
How many items should go on one shelf?
There is no fixed number, but three parts is a reliable starting point: one larger anchor, one tall piece and one small low piece. On a longer shelf you can repeat that group once with a clear gap in between. If a shelf holds more than five or six separate things, it usually starts to read as storage.
Should books be upright or stacked on farmhouse shelves?
Use both. A short upright row gives a shelf a strong vertical block, while a horizontal stack of two or three books makes a platform for a small bowl or plant. Alternating the two from shelf to shelf keeps a bookcase from looking like a library wall and still leaves the books easy to reach.
What do I do with things I need on the shelf but do not want to see?
Give them a container that suits the palette. A lidded woven basket, a wooden box or a stoneware crock hides remotes, chargers, cables and paperwork while adding texture. Keep it to one or two containers per unit and place them on lower shelves, where larger, heavier-looking shapes sit most comfortably.